ASP.NET Coreで作成したWebSocketサーバをAzure Service Busを使ってスケールアウトに対応してみた
はじめに
前回の記事で失敗しましたので、今回はAzure Service Busを使ってスケールアウトを実装してみました。
実装
コード
今回のコードはここに保存されています。
NET CoreでのService busの利用
良い感じのパッケージがなかったので今回はメッセージの送受信は
AMQP.Net.Liteを使いました。
Service Busの操作はRest APIを使用して実装しました。
Service Bus
AzureでService Busの設定を行います。
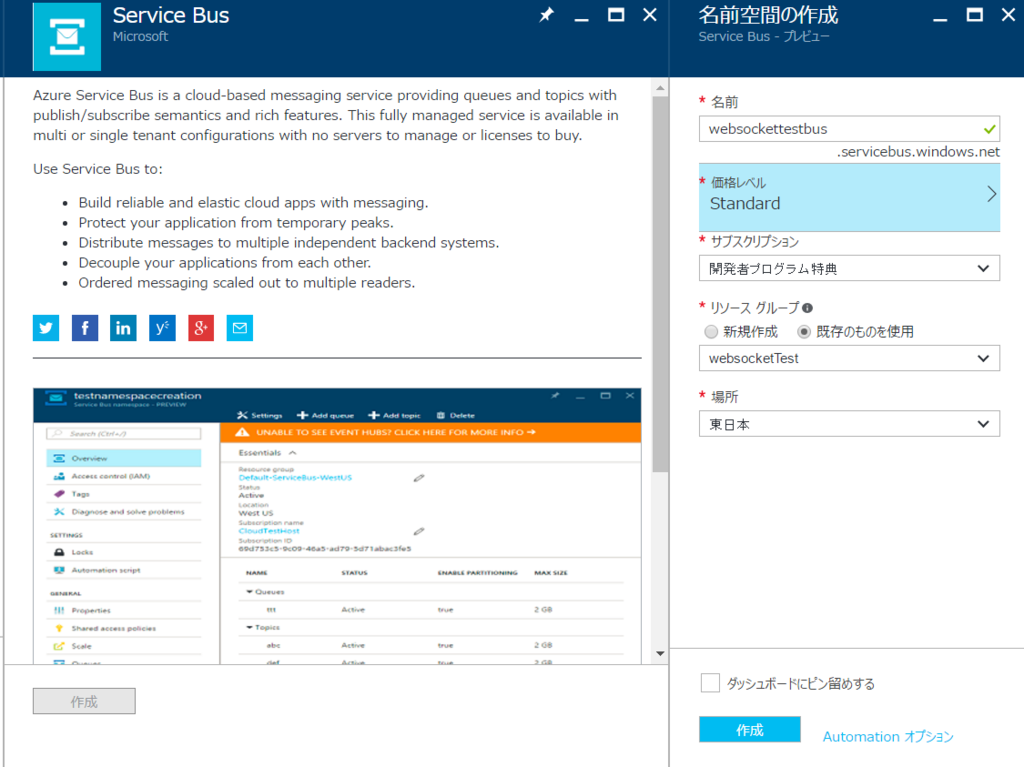
まずはリソースグループにServiceBusを作成します。

価格レベルは、スケールアウトにTopicを使うためStandard以上にしてください。
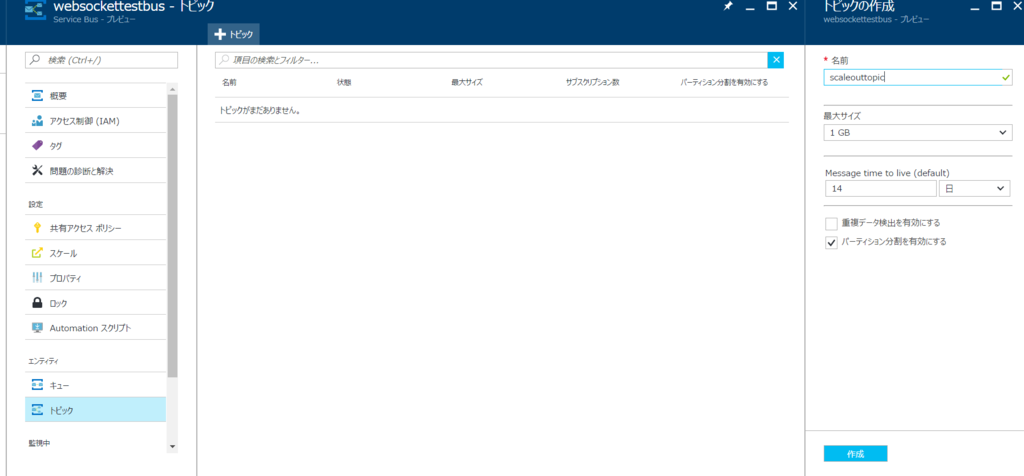
次にTopicの作成を行います。

これで、今回のAzure側での操作は完了です。
では、プログラムの解説を行っていきましす。
Service Busへのメッセージの送信
送信は特に難しい事は無くて
AmqpLiteを使えば簡単に送信できます。
        public void OnNext(ChatMessage value)
        {
            if (senderLink == null || senderLink.IsClosed)
            {
                senderLink = new SenderLink(GetSession(GetConnection()), SenderSubscriptionId, Topic);
            }

            var message = new Amqp.Message(JsonConvert.SerializeObject(value));
            message.Properties = new Properties
            {
                MessageId = Guid.NewGuid().ToString()
            };
            message.ApplicationProperties = new ApplicationProperties();
            message.ApplicationProperties["Message.Type.FullName"] = typeof(string).FullName;
            senderLink.Send(message);
        }
こんなイメージです。
ちなみにSenderLinkクラスのコンストラクタ引数ですが
    public abstract class  TopicsClientBase
    {
        public string NameSpaceUrl { get; set; } = "";
        public string BaseUrl => $"https://{NameSpaceUrl}/";
        public string PolicyName { get; set; } = "";
        public string Key { get; set; } = "";
        public string ConnectionString => $"amqps://{WebUtility.UrlEncode(PolicyName)}:{WebUtility.UrlEncode(Key)}@{NameSpaceUrl}/";
        public string Topic { get; set; } = "";
        protected Address GetAddress() => new Address(ConnectionString);
        protected Connection GetConnection() => new Connection(new Address(ConnectionString));
        protected Session GetSession(Connection connection) => new Session(connection);

    }
ベースクラスがこんな感じになっていて
NameSpaceUrlにはxxxxxxxxxx.servicebus.windows.netみたいな感じのUrlを設定します。xxxxxxxの部分は作成したServiceBusの名前です。
PolicyNameとKeyは

この辺の値を設定します。
Topicは先ほど作成したTopicの名前です。
Service Busからの受信
Service Bus Topicからの受信を行うクラスです。
受信開始時にTopicに送信されたメッセージを購読するためにSubscriptionと追加します。
Subscriptionの名前はGUIDを作成して使用しています。
今回はRest APIで実装していましてこんな感じです。
        private static async Task<HttpResponseMessage> CreateSubscriptionAsync(string baseAddress, string topicName,
            string subscriptionName, string token)
        {
            var subscriptionAddress = baseAddress + topicName + "/Subscriptions/" + subscriptionName;
            var client = new HttpClient();
            client.DefaultRequestHeaders.Authorization = AuthenticationHeaderValue.Parse(token);
            var putData = @"<entry xmlns=""http://www.w3.org/2005/Atom"">
                                  <title type=""text"">" + subscriptionName + @"</title>
                                  <content type=""application/xml"">
                                    <SubscriptionDescription xmlns:i=""http://www.w3.org/2001/XMLSchema-instance"" xmlns=""http://schemas.microsoft.com/netservices/2010/10/servicebus/connect"" />
                                  </content>
                                </entry>";
            return
                await client.PutAsync(subscriptionAddress, new ByteArrayContent(Encoding.UTF8.GetBytes(putData)))
                    .ConfigureAwait(false);
        }
ほとんどマイクロソフトのサンプル通りな感じです。
そして購読を追加したらReceiverLinkクラスを使用して受信を行います。
受信の方法はいくつかあってReceiverLink.ReceiveAsyncメソッドによって受信処理を行うこともできるしReceiverLink.Startメソッドでコールバックを登録する形式でも受信できます。
今回はStartメソッドを使用しました。
そしてTopicReceiveクラスにIDisposableを設定してDispose時に、先ほど作成したSubscriptionを削除するようにしています。
削除関数はこんな感じ
        private static async Task<HttpResponseMessage> DeleteSubscriptionAsync(string baseAddress, string topicName,
            string subscriptionName, string token)
        {
            var subscriptionAddress = baseAddress + topicName + "/Subscriptions/" + subscriptionName;
            var client = new HttpClient();
            client.DefaultRequestHeaders.Authorization = AuthenticationHeaderValue.Parse(token);

            return await client.DeleteAsync(subscriptionAddress).ConfigureAwait(false);
        }
削除しないとSubscriptionが残ったままになっちゃいます。
今回も送信/受信はObserver/Observableパターンで実装しています。
なのでChatServerクラスをこんな感じにします。
今回の一番の変更点はTopicReceiverクラスがIDisposableインターフェースを持っているため、TopicReceiverをメンバに持つChatServerクラスもIDisposableを実装するようにしました。
ASP.NET MVC Coreでアプリケーションシャットダウン時に処理する方法ですが、StartUpクラスのConfigureメソッドの引数にIApplicationLifetimeインターフェースの引数を追加し、
        // This method gets called by the runtime. Use this method to configure the HTTP request pipeline.
        public async void Configure(IApplicationBuilder app, IHostingEnvironment env, ILoggerFactory loggerFactory, IApplicationLifetime applicationLifetim)
        {
            loggerFactory.AddConsole();

            if (env.IsDevelopment())
                app.UseDeveloperExceptionPage();

            applicationLifetim.ApplicationStopping.Register(Stopping);
        }
        private void Stopping()
        {
            _chatServer.Dispose();
        }
こんな感じで処理を登録してあげることで終了開始時、終了時などに処理を実行することができます。
おわりに
SigalRを使わずにWebSocketサーバを作成することはそんなに難しくなく行うことができます。
もちろん、これまでのサンプル実装はエラー処理なども入れていないので、実践的に使用するためにはもっときちんとした実装が必要です、
ただSignalRでは大きすぎる、もっと細かくゴリゴリしたい、みたいな時にはこんな感じで実装していけばよいよっていう一端をご紹介できたかと思います。
それではまた(^^)/